Showing posts with label handmade baby gifts. Show all posts

Monday, September 29, 2014

Handmade Baby Toys

My niece will be giving birth to her first child any day now. It seems like no time at all ago that my brother's phone call woke me up one morning to spread the good news of his own child's arrival, and now that girl is going to be a mom. Time has wings! With the due date quickly approaching, I recently set out to make her a blanket, and thought, "While I'm at it, maybe a soft toy, too." Then-how about some sweet little felt booties? Ooh, and a rattle! The baby needs one of those. And finally, a little tag edged blanket toy with some crinkly plastic inside, for some sensory thrills. Apart from the large blanket, which turned out to be a bit of white whale, and the bunny, which took a couple of hours to finish, these toys can be whipped up in fairly short order. Links to any patterns or tutorials I used are indicated in the captions below each of the photos that follow.
I've made many a bunny for babies, both for my own kids and for friends. The pattern and instructions for this bunny came from Martha Stewart. Her project calls for using men's suiting fabric, but I always use felted cashmere. 
I made this egg from a pattern in last year's easter issue of Making Magazine, which is published here in the UK. But patterns for stuffed sewn eggs abound online, so just google it. I hacked the instructions by placing four little bells inside a piece of muslin, which I sewed securely shut. Then I stuffed the bell pouch in between layers of egg stuffing, as in the middle of the egg as I could get. Because of the stuffing the bells make a shaky rather than tinkly sound.
These adorbs and easy to assemble felt booties are from the fab folks at The Purl Bee. This blog is hands down one of the best sewing and knitting sites I know of. And whenever I go back to New York, I always, always make a trip to Purl Soho to stock up on fabrics and notions, and take in the general air of handmade gorgeousness that permeates the entire space.
This little tag blanket/toy was something I whipped up on a whim. I sandwiched some bias tape and ribbon loops around the perimeter and in between two pieces of fabric (each about 6"x8", right sides facing), added a layer of crinkly plastic to the top, and sewed all the way around with a half inch seam allowance. I left a four inch opening for turning right side out, then ladder stitched the opening closed.
I'd started the blanket quite a while ago (not knowing who it'd be for), so had a beginning with some rectangles of felted cashmere for the top. Browsing through a recently purchased copy of a Merchant and Mills sewing book, I saw instructions for making a double sided blanked with mitred corners and went for that to finish it. Unfortunately, the instructions weren't so clear to me, and I made a mess of the whole thing. After a grumbling hour or so with a seam ripper, I started again. There are many online tutorials for this technique, but the one I found most useful in terms of visual instruction came from Simple Simon and Co. In the end my border was a little wonky, since I'd already cut the corners off in my first attempt at this. And because I used a bulkyish, pieced, top layer instead of a single piece of fabric, the blanket will probably be put to better use as a playmat.

If you have a favorite baby gift you either given or received, please feel free to share in the comments below.


Thursday, April 12, 2012

Customized Iron-On Baby Bodysuits


Because I'm so lazy, I mean, busy, I'm cutting and pasting a post I did last week for the Etsy New York team blog. Hope you enjoy it. Now, back to being lazy.

This past weekend I went to a good friend's baby shower. In the weeks leading up to the party, I had it in the back of my mind to make a meaningful gift for the baby, whose gender remains a mystery. Alas, time ran away from me, and with just a few days left before the shower it was clear I wasn't going to be making any hand stitched quilts or fabric alphabet baby books. But I'm a firm believer in hand made gifts whenever possible (and its always possible, if you ask me), so I settled on something that was quick and easy to make, and also very practical.

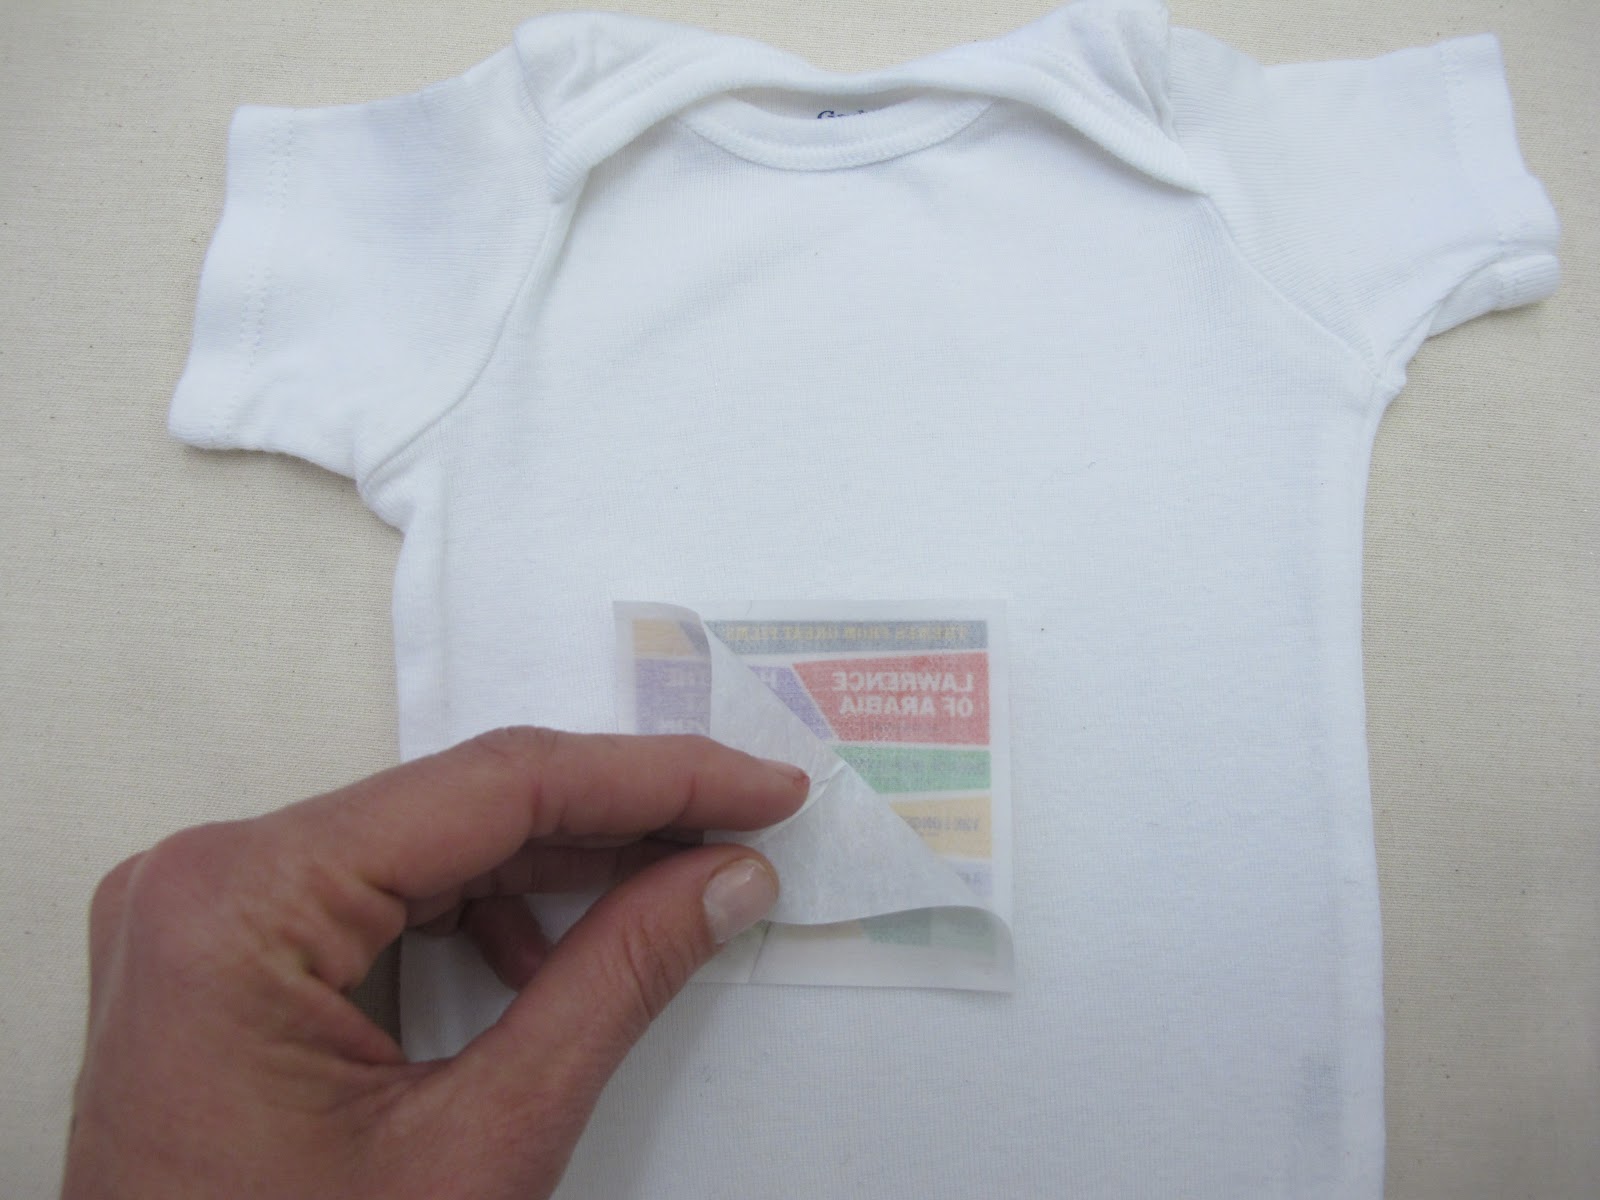
I customized these bodysuits by making iron-on labels with images of vintage album covers that I found online. The easiest way to do this is to print your images onto inkjet fabric transfer paper which then irons right onto fabric. (Make sure you reverse any images that include text in photo editing software before you print!) I opted instead for printing onto sew-on printable fabric sheets, because the "paper" is actually fabric and has, in my opinion, a nicer look and feel than the iron on transfer paper. Its also got better longevity through multiple washings, and baby clothes get washed a lot! Printed Treasures is a brand that makes printable fabric, and they have both sew-in and iron-on versions. I happened to already have a pack of the former in my studio, but I wanted to iron the album art on. So I attached a sheet of fusible web onto the back of my images and turned them into iron-ons. Here's what I did, step by step:


First, I selected six vintage album cover images, scaled them each down to about three by three inches in Photoshop and fit them all onto a single page, making sure to leave room for a thin white border around each one. Next I printed it out onto a sheet of sewable inkjet photo paper. The instructions suggest rinsing the paper in cold water for a couple of minutes and letting it air dry before use, to wash out any remaining ink on the top layer of the fabric.


When the fabric was dry I ironed a sheet of double sided fusible web onto the back. There are several brands of fusible web available; I am partial to Steam A Seam 2 for making iron-ons.


Using a straight edge ruler and rotary cutter, I cut out all six images.


I used double sided fusible web, so before ironing the applique onto the romper I peeled away the backing.


Then I ironed on my homemade applique following the manufacturer's instructions for the fusible web.


When I was finished I rolled each of the bodysuits up and tied it with a pretty ribbon, then wrapped the whole lot of them in tissue paper.

As a finishing touch I made a final applique with this vintage image of mother, father and baby with a caption that reads "Now We Are Three", and put it onto a cloth drawstring bag. I put all of the rompers inside the bag, which my friend can reuse to store blocks, dolls or Lego later on down the road.

Sunday, March 4, 2012

Birth Announcement


Well, its a little premature, but I couldn't wait to share the news that my new Etsy shop is unofficially officially up and running. May I present I Spy Baby Bunting, a repository for little childhood delights that I loved making so much, I decided to make them available for anyone else who might like them too. Right now I've only got a few items for sale, but there'll be more coming down the pike soon, including additional sparkly banners, hair accessories, custom embroidered decor and a few soft toys. I am in the market for a few little models, so if you're baby is dying to show off his or her legs or model a headband, give me a holler. I'll pay you in bath bombs.