Friday, December 23, 2011

The Twelve Days of Christmas Crafts, Day 12: Simple Zip Felt Pouch


I'll be honest and admit that I'm pretty much running on fumes tonight. I still haven't finished wrapping presents or making gifts, but I've done a lot of what I had set out to do by now, including making it through these twelve holiday posts. I had so much fun doing them, and hope you've enjoyed reading and maybe even making some of them too. Tonight's project is another fairly simple but useful tutorial on making a zipper pouch. Only very recently have I started making my own; here are a couple of examples shown below.


The blue one was my first stab at a fancy lined bag with zipper end covers (you can sort of make out the little bits of pink on either end of the zipper), and I use it as my camera case. The yellow one is felt, and I use it as a make up bag. While I found lots of tutorials online for making the first one, (my favorite, and the one I used to make the case shown, is this one) the easier felt one I figured out on my own. But if you've never made a zip pouch, this is a good one to start with for a few reasons. First, while a liner is a really nice feature, it makes the pouch a little trickier to complete. Second, who needs zipper covers? And finally, using felt (which I still have a bunch of left over from the birthday crowns for Charlie's party) means I don't have to worry about the right side and wrong side of the fabric-both sides are the same so I won't accidentally sew my bag inside out.

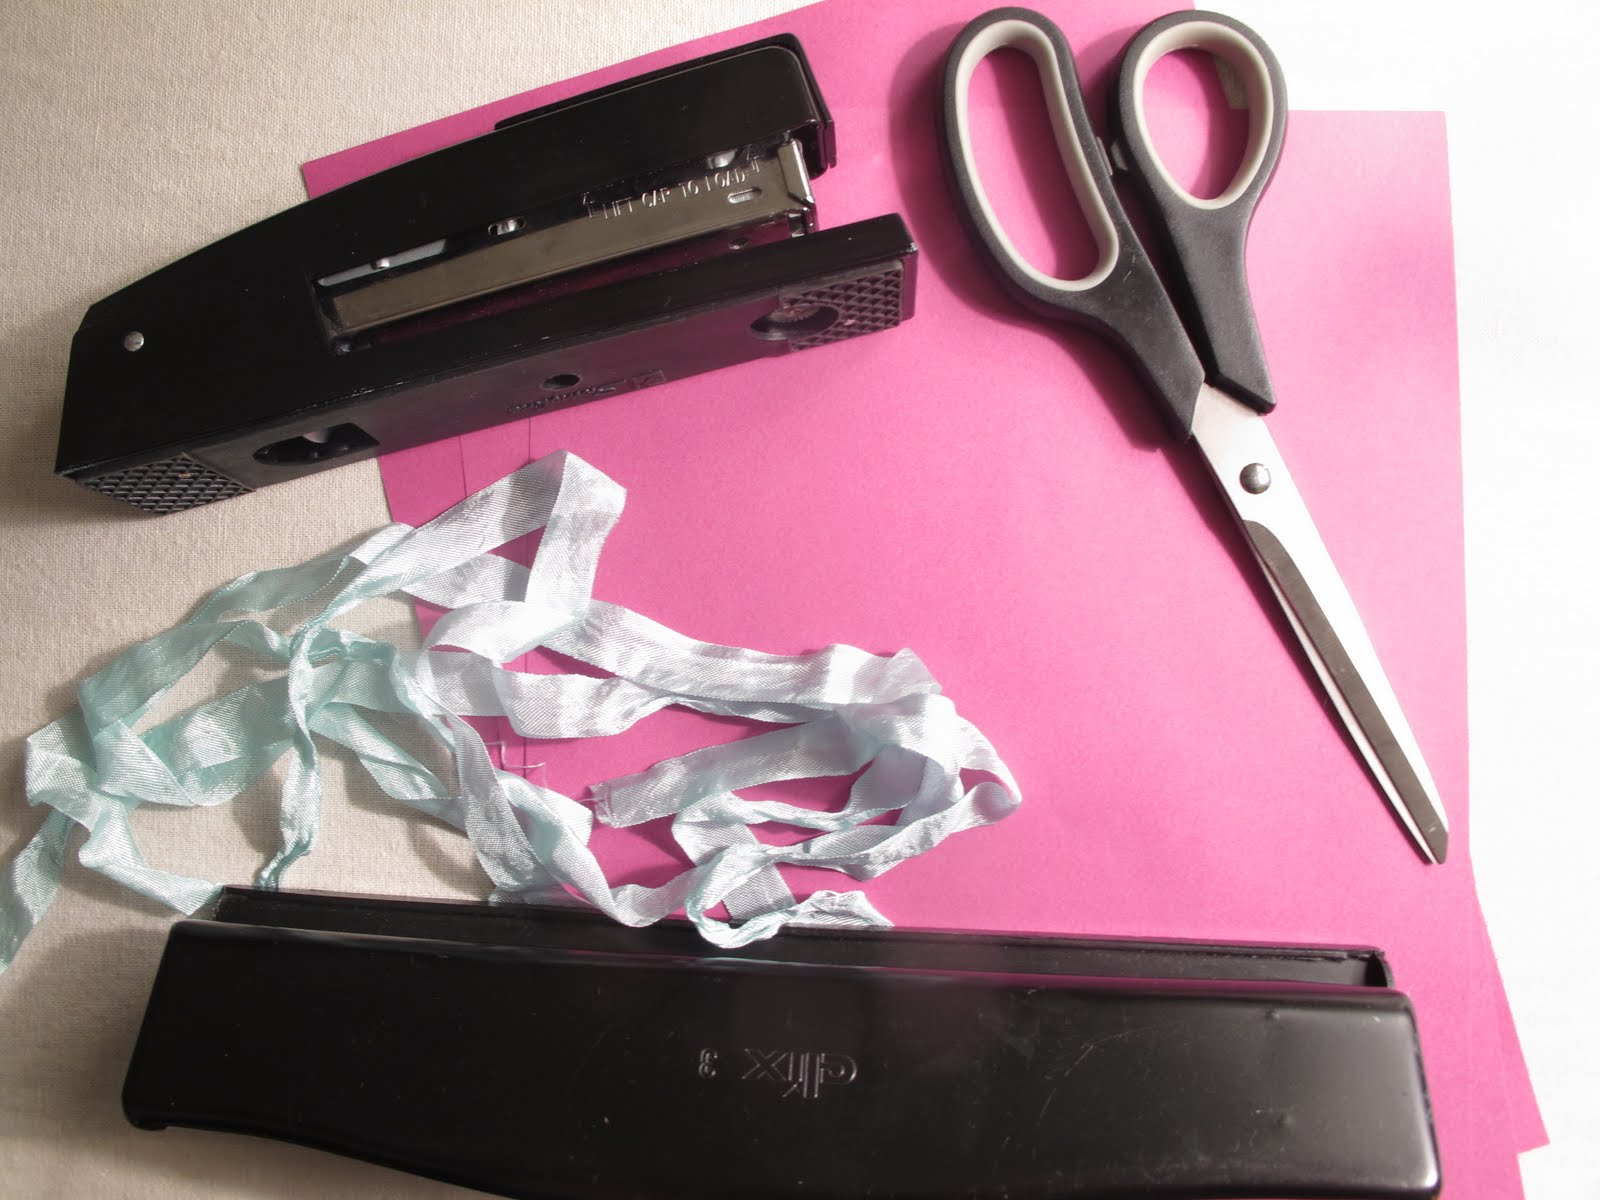
Apart from a zipper foot for your sewing machine, which you don't need but makes sewing a zipper a lot easier, this project requires stuff you probably already have lying around, and/or can easily pick up at any drugstore, craft store, etc.

You'll need:
2 rectangles of felt; 7" wide by 6 1/2" long
1 Zipper (either a 7" zipper or a longer one cut down to 7", with the cut end basted)
Machine zipper foot
Coordinating thread
scissors


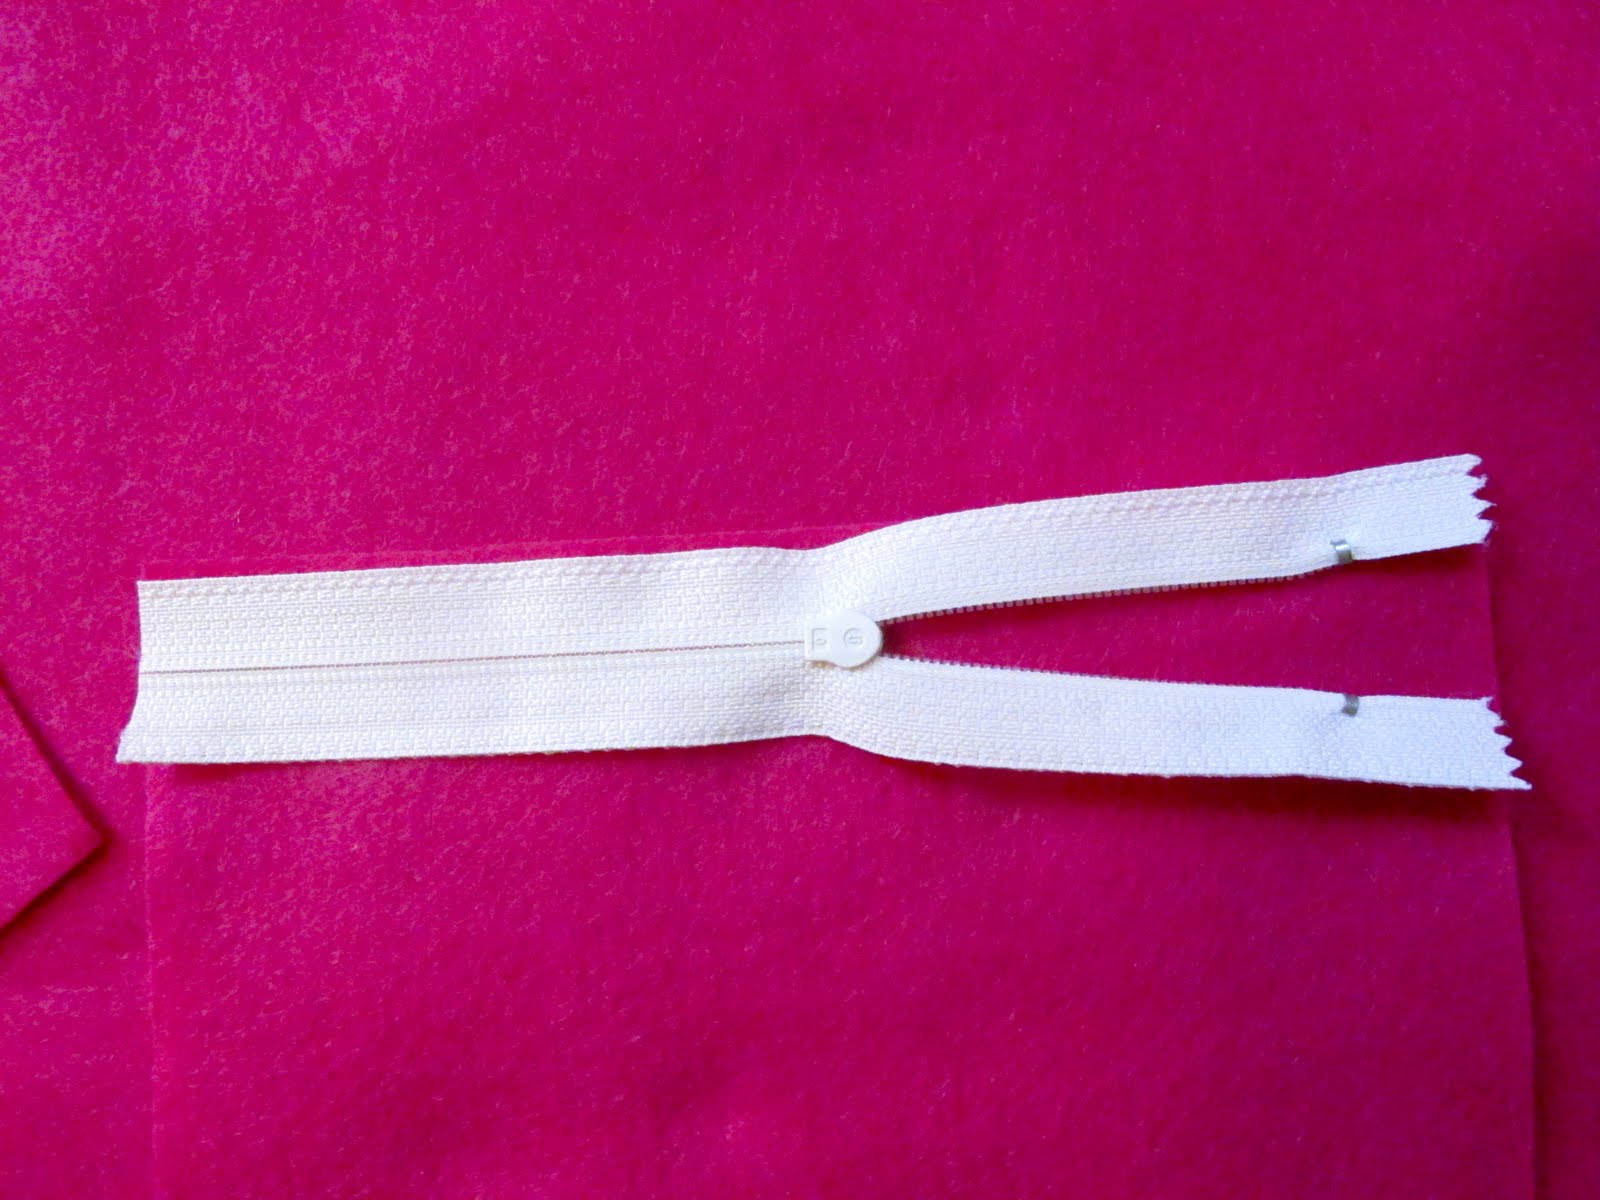
First lay one piece of felt on the table, then lay the zipper, zip side down, on top of the felt, with the edges lined up.


Pin zipper into place. Sew along the zipper, about 1/8" away from the teeth.


Next flip the whole thing over and pin your other piece of felt to the opposite side, again lining up the top of the zipper with the top of the felt. (So the zipper will be facing you, and you'll sew the second piece of felt to the top of that part.)


Pin and sew.


Finally, unzip the zipper about halfway, and pin and sew around the open three sides of the pouch. Be sure to backstitch around the corners to make them nice and strong.


Turn the pouch inside out through the space you left for yourself where the zip was left undone.


And you're done!


My plan is to make a few more of these in bright colors and smaller sizes, which I'll use to keep stuff that I'm always losing at the bottom of my purse, like my keys and my phone. And maybe my mind. I can't ever seem to remember where I put that thing anymore.

I'll be taking the next week or two off of posting so I can kick back and enjoy time with my family.
Hope everyone out there has a happy Christmas/Hanukah/Kwanza/Festivus or, just a beautiful day. See you next year. xx


Thursday, December 22, 2011

The Twelve Days of Christmas Crafts, Day 11: Cocolate Almond Squares


We’ve lived in the house we currently inhabit for about eight years now, and we love our neighborhood. One of the things that makes it so great is that we genuinely like our neighbors. Over the years the folks living closest to us have collected our mail, moved our car on alternate side parking days, signed for our UPS boxes, and given us excellent gardening advice. Three of them have children who have babysat for mine, one of them (a former fireman) made his way into one of our upper story windows when I was locked out, and several of them have a spare key to my house should I ever get locked out again. I’ve enjoyed chatting with them and getting to know them over time. Although we always thank them on the spot for their various good deeds, we also like to bring them a little something extra around the holidays, to let them know how much we appreciate them.

Baking has never been my strong suit (though I’m incredibly skilled at eating baked goods). It requires a level of precision that I just can’t seem to manage, or am just too lazy to bother with. In the past I’ve baked cookies and brownies for my neighbors, but this year I’m giving them something a little different. These squares, which I saw someone making a similar version of (on a muted tv in a convenience store while I was waiting to have my car washed), are really delicious and easy to make even if, like me, you aren’t an exacting baker.

Here’s what you’ll need:


One nine inch square baking pan
Half a packet (about 4 oz) of unsweetened shredded coconut
About 6 oz. of semi-sweet chocolate chips
Most of a 14 oz. can of sweetened condensed milk
4 oz. of chopped salted almonds (Note: you can use plain almonds if you want. I like the sweet and salty combination, myself.)

First spread a layer of shredded coconut to cover the bottom of the pan.


Cover the coconut with a layer of the chocolate chips. Drizzle the condensed milk over the chocolate until its pretty much covered up.


Coarsely chop the almonds and spread them across the top. If your kids are helping you bake, you can assign them the task of smashing the almonds. Put them in a ziplock or a produce bag, and let your child smash them up with a rolling pin or can of soup.


Throw the pan in an oven preheated to 375 degrees for about 25 minutes.


When they’re done you can see where the condensed milk sort of caramelized, which keeps the whole thing together. Let the pan cool outside of the oven for a while. Then cool them completely in the refrigerator before cutting them into squares. Wrap them in wax paper first, then some colorful tissue paper tied up with a nice ribbon. (My favorite way to wrap just about anything.)

Wednesday, December 21, 2011

The Twelve Days of Christmas Crafts, Day 10: Simple Paper Hearts Garland


This isn't a holiday craft, per se, but its cheerful and festive and as such it fits in with the spirit of the season as I like to celebrate it. I suppose you could make this as a gift for someone; they can take it out and hang it up before a birthday party or celebration of any kind, really. I'm pretty sure this is something we'll keep up long after the Christmas tree comes down. In part that's because it takes me forever to do anything, like un-decorate at the appropriate time. But anything that adds a little color and cheer through the long, dark days of winter can't be bad, even if its a tangible sign of my procrastination.

This garland took me about half an hour to make, and it requires very few materials. Here's what you need:


8-10 sheets of colorful paper (construction paper will work, but I used a slightly heavier paper because I want it to last a little longer)
Scissors
Stapler
Hole punch
Ribbon or string

First cut your paper into strips, cutting along the longer side of the paper (so they'll be 11" long). I cut out five rows per page.


Next you make little heart shaped thingies with each strip. (I got a really high score on the verbal portion of my SATs. "Thingies". Wow.) First bend your paper over like so:


And then like so:


Secure your heart with a staple. (Note: I knew I'd be hanging my garland high enough up that the staples wouldn't be visible. Even if they are, I don't really care. But if you want a garland without them, you can secure your hearts with a glue stick, and hold the ends together with a paper clip til they dry. Then continue with additional steps as listed below.)


Punch a hole in the center of the base of the heart, about a quarter of an inch from the edge. I couldn't find my single hole puncher, the center hole of a three hole punch worked just fine.


Repeat these steps with all of your strips of paper.


I used yellow as well as pink.


Now start threading your hearts onto a ribbon or string.


Keep going...


Space the hearts evenly along the ribbon, and plump up any hearts that may have gotten flattened out while you were threading. Do this by gently pushing against the rounded bottoms where the paper bends.


And that's it. Jakie loved this project. He ran back and forth between helping Henry hang up our outside lights and me folding, stapling and hole punching. He jumped into my photo totally unsolicited.
Here's the finished garland once more:


Phew. Just three more days til Christmas and I still have a lot of sewing and making to do for gifts. Tomorrow we're making baked treats for the neighbors, which has become a tradition. Check in then to see what they're getting. And Happy Hanukah to some of you!


Tuesday, December 20, 2011

The Twelve Days of Christmas Crafts, Day 9: Easy Upcycled Felted Fingerless Gloves


I took my boys up to Rockefeller Center to have a gander at the tree today. Its fun to go into the city now and then and feel like tourists, asking strangers to take our pictures in front of landmark spots like this one. We also watched the ice skaters and visited the Lego store, where we marveled at the amazing things that can be sculpted from tiny plastic bricks.

Today was another pretty mild day for this time of year. If you look closely in this photo you can see I'm wearing a pair of those fingerless gloves which I like to wear when its not super cold. These were given to me by my mother in law for Christmas a couple of years ago. Tonight I sat at the kitchen table and took a stab at making another pair from the stash of felted wool sweaters I raided to make upcycled baby legwarmers a few weeks ago. Here's what I did.

I picked out a dark grey wool sweater with intact sleeves, and cut them both off to about 12" in length.


The cuff of the sweater will be the top of the glove. Next, I turned the sleeves inside out, and snipped a little incision into the seam of the sleeve, about three inches below the top edge of each one.


I put the glove on to make sure the incision was in the right spot, and to stretch it out a little bit before sewing on the thumb piece.


Next I picked out another sweater in a different color for the thumb fabric. I used the neck section of this sweater for the ribbing, so the top of the thumb pieces have a finished look. I cut two pieces measuring about three inches across and three inches long.


I pinned these together, right sides facing, and sewed them along the edge, backstitching all the way to make the seam nice and strong.


Next, I turned the thumb right side out. Then I pushed it through the hole in the glove til the edges of the glove and the thumb lined up, and also the seams of the glove and the thumb piece faced each other. (The glove piece is still turned inside out at this point.) With my finger through the thumb hole as a guide, I began sewing the two edges together using a whipstitch.


I repeated this with the thumb piece on the other glove. Then I turned them right side in, and decided I was finished.


And here's how they looked on my hands. With the shape my hands are in at the moment, I should probably not have been my own model. But you get the picture. Not bad for my first attempt, right? I think I'm going to try and crank out a couple more pairs as Christmas gifts for my sisters. I've got plenty of sleeves left to play with.


Monday, December 19, 2011

Twelve Days of Christmas Crafts, Day 8: Cold Process Soap


I'm going get this post in just under the wire tonight, since we just got home from dinner at our friend Valentina's place. Val is an amazing cook and a generous hostess, so I always try to bring a little something to her whenever we go over. (As opposed to those friends who are lousy cooks and mean hosts, to whom I bring nothing.) As we were getting ready to leave the house tonight, and I wondered what to bring, I remembered the batch of soap that I made in October, and decided it was ready for holiday gifting. Cold process soap needs to cure for four to six weeks before its ready for use, so now is an ideal time for me to give it away. This batch had been hiding in a plastic bowl on top of the refrigerator. It was poured into plastic cups to cure, so it popped out looking like this:


So I sliced off a few pieces:


And am giving these three to Val. I can't seem to remember exactly which is which, but two of these are shea butter soaps. One has lavender and citrus, one is plain with a little oatmeal as an exfoliant. The additives in the third completely escape my ever more porous memory, but I've asked Val to report back to me.


I made this soap at a class at Make Workshop here in New York City. The teachers were a couple called Tara and Jeff, and their company is called Meow Meow Tweet. They make all kinds of soap products, and are also advocates of sustainable, local and handmade living. You can read their blog here. I could not believe how easy the process of making real soap was (meaning soap that uses lye, rather than melt and pour glycerin soap), and on my Christmas wish list I asked Henry for a bunch of stuff from Brambleberry, which sells supplies for the soap making hobbyist. They also offers extensive information on how to make soap. Because of the caustic nature of lye, and because of the precision required at certain steps in the soap making process, I'd definitely recommend learning how to do this in person if at all possible.

For the new year, I'm making a renewed commitment to greening certain areas of our lives, and getting rid of chemicals wherever possible is high up on the list. Handmade soap doesn't feel like it'll be a sacrifice of any kind. Getting rid of my favorite blue laundry detergent is going to be harder, I think. But I'm going to give it a try.

Here is the soap all wrapped up in muslin and a green ribbon, ready for giving. Adorable child not included.


Sunday, December 18, 2011

Twelve Days of Christmas, Day 7: Make Your Own Challah Cover


I just got home a little while ago from my last craft fair of the season. In addition to selling totes this month, I've also been selling these little kits, intended as Hanukah gifts, for making challah covers. Though we're not Jewish, my friend Andrea, who is, introduced my kids and I to the Friday evening Shabbat ritual at her house one evening. I loved the blessing of the wine (juice for us) and bread that preceded the meal, and I was immediately enamored with the idea of the challah cover. I went online shortly afterwards and found many examples of beautifully designed covers, embroidered on silk and linen, with traditional design motifs ranging from pomegranates to wheat to birds to "the seven spices". You can see what I mean by looking here and here.

Though the traditional designs are beautiful, challah covers can have any design on them at all, and this tutorial shows how to make a simple cover with a contemporary design using simple templates that you will have on hand at home.

To make a cover (or a kit, to give as a gift for a kid crafter), you'll need the following:


One 20" x 20" piece of linen or muslin, edges hemmed, OR one store bought cloth napkin of the same size
Scraps of fabric in coordinating colors
Double sided fusible web, such as Steam-A-Seam 2, sold at craft stores in packs of 3 sheets
Tracing templates, such as circles, squares or other shapes
Scissors, or an exacto knife and self healing mat
Fine tipped Sharpie
An iron
Optional: If you're going to make a kit, you'll also need some glassine envelopes to put the applique pieces into. You can also buy a packaging kit (like the ones I used in the photo above) at Staples. I used Avery 22801 Printable Toppers and Bags. If you're on a budget you can package the kit nicely in tissue paper or a brown paper lunch bag with a printed label on it too.

To begin:
Begin applying pieces of the fusible web to the back sides of your fabric scraps. First peel away a single side of the backing, as shown, and apply the sticky side to the fabric. Follow the instructions for the fusible web to iron it onto the fabric.


Next trace the shapes from your template onto the ironed on backing using a fine tipped Sharpie. If you don't have templates like the ones pictured, just collect a few round things of various sizes that you have lying around, like a glue stick and a jam jar, and trace around the bottom of them.


Cut out your shapes until you have all of your design elements.


Take a few minutes to play around with various designs on your cover. Keep moving your pieces around til you come up with something you like.


Now get ready to attach your pieces. Peel away the protective backing from your applique pieces, as shown, and stick them back onto the cover. (Make sure that your cover is ironed out and smooth first.)


Once all of your pieces are in place, run a hot iron over them, making sure to iron for about fifteen seconds total over each pieces. (The instructions for doing this will be included with the fusible web.)


Above is a photo of the cover over a loaf of bread that is not challah. But you get the point.

That's it! This is great project for parents to do with their children. Though my family doesn't practice any formal religion in our home, Henry and I have been talking lately about our relationship with food, and the idea of being more mindful of what we eat. So I'll close this post with some words that we may soon adapt as a pre-meal prayer at our own table. These are known as The 5 Contemplations, by Thich Nhat Hanh.

1. This food is the gift of the whole universe: the earth, the sky, numerous living beings, and much hard, loving work.
2. May we eat with mindfulness and gratitude so as to be worthy to receive it.
3. May we recognize and transform our unwholesome mental formations, especially our greed, and learn to eat with moderation.
4. May we keep our compassion alive by eating in such a way that we reduce the suffering of living beings, preserve our planet, and reverse the process of global warming.
5. We accept this food so that we may nurture our sister- hood and brotherhood, strengthen our community, and nourish our ideal of serving all living beings.