Saturday, November 30, 2013

Making Cardboard Castles

In part because Christmas is coming and also because we live in the boonies and order stuff online quite a bit, we have a bumper crop of cardboard in the recycling bin this week. Today we were hanging around at home and Charlie, who has been studying castles and knights at school, asked if we could build a castle. He wanted to make it out of play doh, but I convinced him that cardboard would be a little more structurally sound. 
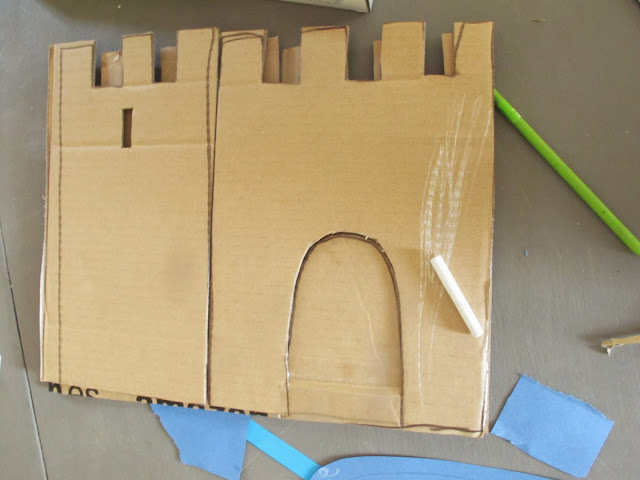
I'm not much of an architect but my kids aren't all that demanding about these sorts of things. I cut up some boxes with an Xacto knife, cut out some rectangle shapes along the top edges, and cut out some drawbridge doors.
The little slit windows were Charlie's idea. He also wanted to include a keep, but then got sidetracked making little flags. 
Above is the inside part, which I attached with cardboard tabs and then bigger strips of tape. 
And here is Charlie's St. George's cross made with a toothpick and tape. 
Charlie was so pleased with my level of compliance today that he made me a sticker chart. I now earn a colorful dot for each new thing I make for him. I'm not sure what I get to cash them in for later, but its definitely an effective motivational tool. 
This was the dining room table tonight before everyone went to bed. The zest for building and embellishing the castle had given way much earlier to actually playing with it, and some knights and other action figures were enlisted into fierce battle. 

Cardboard structures are a frequent go-to crafting project at our house. There is generally a steady supply of material at hand, we don't need much in the way of other materials (usually some tape, a cutting mat and xacto blade, and some imagination). Often their request for cardboard toys follow a current interest. For instance during their Wallace and Gromit phase last year, they wanted a to build a rocket ship after watching "A Grand Day Out". Here's what we came up with for that:
One of the other great things about cardboard toys? When the novelty of playing with them wears off, they go right back into the recycling bin. 

Wednesday, November 27, 2013

Handmade Holiday Gift Idea: Custom Embroidery Kit for Teen Girls

I'm trying to get a little bit of a jump start on Christmas gifts this year because, where appropriate, I want to make as many of them as I can. Today I put together this custom embroidery kit for my niece, Eva, who is twelve. (I'm pretty sure she doesn't read my blog, so hopefully I'm not ruining any surprises here.) A few weeks ago she casually asked me if I could teach her how to embroider, and I tried to act all cool and nonchalant and said "Sure thing", when inside I was jumping up and down with excitement. Though I try to infect my boys with the crafting virus at every opportunity, they have for the most part remained immune to the lure of needle crafts. 

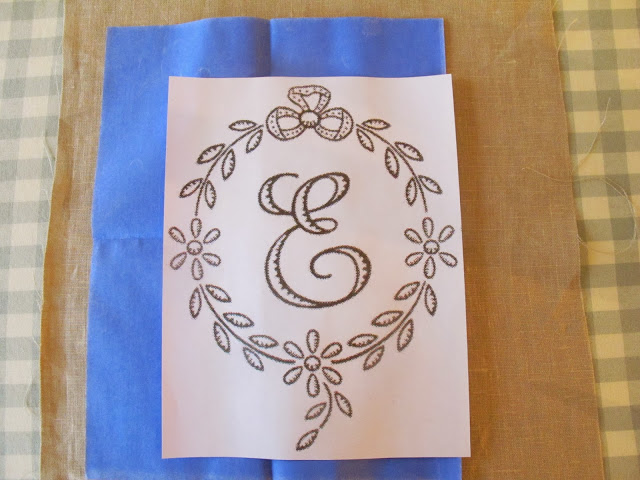
For this kit I've included a hoop, some needles, a few skeins of embroidery floss, some pretty scissors, and two pieces of linen. One piece is plain, to learn her stitches on, and on the second piece I traced a pretty letter E with a floral border that I got from this book:
To transfer the letter to the linen, I scanned it into my computer, enlarged it to fit the piece of linen I wanted to use, and traced it right onto the fabric using embroidery carbon paper. I put everything in place for tracing, then taped it all down onto the table so it wouldn't move around. 
This picture doesn't show it, but I also taped the carbon paper to the linen and taped the letter to the carbon paper. Notice the carbon paper is right side down, the letter is right side up. Then I traced the whole thing. 
So here's the tracing on the linen, so she can stitch right on top of the lines. 
I had to include a close up of these gorgeous embroidery scissors, which were hard to resist keeping for myself. They cost about ten bucks, bringing the total cost of this gift to about $13, or £8.50 I also included a tagged card that tells her this gift includes free embroidery instruction with me, which, of course, is priceless.

If you're making gifts for anyone this year please share your ideas with me. I'll be adding more of my own as my holiday making plans kick into gear. To my American friends, have a very happy Thanksgiving tomorrow. Even though we won't be officially celebrating here, I'll be counting my blessings as always. 

Friday, November 22, 2013

How To Make A Simple Felt Christmas Tree Garland

While tidying up in my studio today I came across a bag of felt strips leftover from a chain garland I made for our Christmas tree a couple of years ago. That garland has since gotten a bit stretched out and doesn't look so great anymore, so I thought I'd make another this year out of the scraps. This project took me a little over an hour to make, and because the little squares are easier to roll up for storage than the chain was, I hope this will have a longer lifespan.

Here's what I did:
Unless you have a bag of wadded up pre-cut felt strips lying around, you'll have to start by making some. Using sheets of craft felt (or real wool felt if you're feeling rich and/or fancy), use a rotary cutter or scissors to slice up the felt into strips an inch wide.

Iron your strips (if needed) and line them up in the order you'd like your colors to go. You can put them together totally randomly, of course, but I wanted mine to be in a repeat of the colors above.
If you have a big self-healing mat and a rotary cutter, you'll be able to line up your strips and cut them into one inch squares lickety split. If you need to cut by hand with scissors, go ahead and eyeball the size of the squares and cut a few strips at a time. It took me just a few minutes to do it with a mat and cutter, like so:
First I squared the ends of each side so they were all exactly 9" across.
Then I whizzed down the rows following my lines, nine times, til I had...
...this.
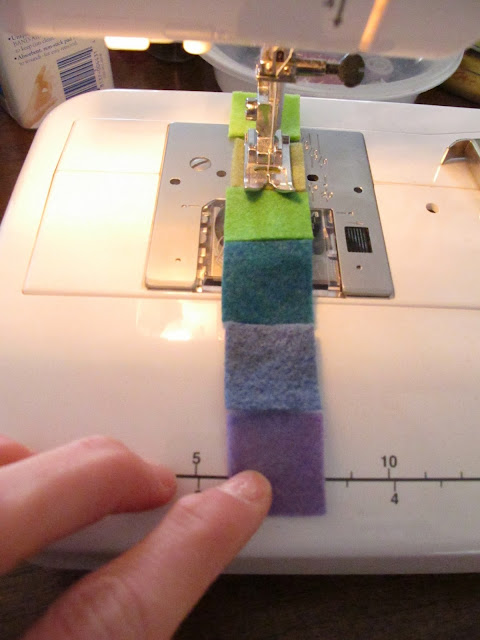
Then I started feeding them through my sewing machine, lining up a few at a time, and making sure that each subsequent square got caught under the presser foot as close to the one before it as possible. Once a square was caught under the foot, I could just keep feeding the next one in, til the next thing I knew I had...
...this. I did three batches of ten 9" strips, so had a total of 180 squares which makes a 15' long chain. If it isn't big enough for our tree, it'll take me no time to whip up another one.

Here it is hanging up in my studio. We haven't gotten our Christmas tree yet, but, lucky us-there is a Christmas tree farm here on the farm. Once we get ours up and decorated I'll add another photo of this garland in its rightful place.